Showing posts with label Recipes. Show all posts

Wednesday, March 2, 2011

Taleggio-Stuffed Prosciutto-Wrapped Chicken with Tomato and Olive Salad


When you find solid good ingredients, I find less is more.  Someone has put a lot of care into making sure these ingredients exist, someone cared enough to sell them in their store, and you cared enough to seek out their product.  So, does it really make sense to then burry them beneath other flavors and ingredients?  Make these flavors the center of your meal.  Pay tribute to them and those that made it possible for you to have them.  In the Wellesley village we are lucky to have a few very specialized shops that provide great ingredients: Wasik’s Cheese Shop, where they claim the title as one of the oldest full service cheese shops in the country, and Tutto Italiano, where they have insanely good sandwiches brought to an ethereal level by the superb buttery prosciutto they sell.  Barbara Lynch has been serving up portions of simple dishes that play tribute to seasonal ingredients in her Boston Restaurants for years, and this recipe, one of her own, does just that.  The Prosciutto adds contrast in color and texture while the earthy Teleggio slowly melted in a bed of boneless, skinless chicken breast erupts as you cut into it, cascading down over the tomato and olive salad.  With just two star ingredients this simple chicken breast is transformed into something extraordinary.

Ingredients:

For the Chicken:

6 boneless, skinless chicken breasts (try to go organic, they will be smaller and therefore much easier to wrap)
6 oz. Taleggio, sliced into 6 pieces
2 T fresh tarragon leaves
12 thin slices prosciutto
2 T extra-virgin olive oil, plus more as needed    

For the Salad (optional):

½ c cherry tomatoes, halved and quartered
1 c pitted kalamata olives
4 small celery stalks, peeled and sliced thinly on the bias
1 bunch fresh parsley, stems trimmed
½ medium red onion, thinly sliced
3 T extra-virgin olive oil
1 T fresh lemon juice
Salt and Pepper to taste

Method:

1. Using a sharp knife, cut a 2-inch pocket lengthwise down the middle of the thickest part of the chicken breast – be careful not to cut all the way through.

2. Put a piece of cheese in the pocket, pinch the meat shut over it, salt and pepper the breast and top with the tarragon.

Taleggio
3. Wrap the prosciutto around the breasts, two pieces per breast.  Be careful to get your prosciutto cut in strips, not disks, it will make our life way easier than mine was…  If the cheese tries to pop back out, poke it back down with a finger as your wrap the prosciutto around it. 


4. Heat the oven to 375. 

5. Heat the oil in a large skillet over medium-high heat and sear the breasts about 5 minutes per side.  Add more oil as needed. Do not try to rush it, the prosciutto will unstick from the bottom of the pan when it is ready to be flipped - otherwise you will tear it and cheese will go everywhere.


6. Put the seared chicken breasts on a baking sheet and bake until cooked through, another 8-12 minutes (or until a thermometer inserted into the thickest part of the breast reads 165).

7. Let the chicken rest, this will allow the meat reabsorb the juices.

8. To make the salad: combine all the ingredients but olive oil, salt, pepper, and lemon juice.  Combine the liquid ingredients separately by whisking and then pour over the chopped salad.


9. To serve: place some of the salad in the center of the plate and then place the chicken breast on top. 


Monday, February 28, 2011

Cherry Wood Smoked Bacon-Chocolate Chip Cookies


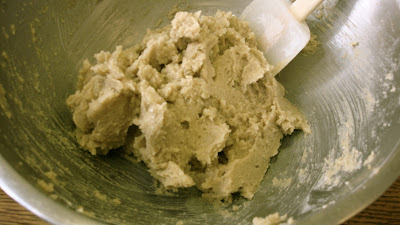
Alright, so as you all know my latest obsession is bacon-chocolate chip cookies and last week I promised you I would try to prefect them – while I have no yet decided on the perfect recipe I have learned a lot.  For one – let the bacon sit in the dough for a while.  The rest time will soften up your bacony bits as well as intensify their flavor.  Also, the sugar used is important.  Yes, sugar is sweet and so are cookies but the role sugar plays in baking is more complex than that: it adds volume, tenderness, texture, color, and acts as a preservative.  I wanted fluffy gooey cookies so I used a lot of dark brown sugar which attracts moisture (more so than light) and reduces gluten content.  Because there is less gluten the batter is lighter and therefore will rise more when baked.  I know it sounds crazy, maybe it is crazy, but you seriously need to try folding bacon into your cookies – it is a surprising and wonderful combination.

Ingredients

½ c unsalted butter, melted and cooled slightly
1 c dark brown sugar
½ c white sugar
2 large eggs
1 t vanilla extract
2 c all-purpose flour
¾ t baking soda
1 t salt
9 oz semi sweet chocolate chips
8 oz cherry wood smoked bacon, fried and chopped

Method

1. Preheat oven to 375.

2. In a small bowl whisk together the flour, baking soda and salt.

3. In another bowl whisk the butter, sugar, eggs and vanilla together.


4. With a wooden spoon stir half the dry ingredients into the wet and stir until incorporated, add the rest of the dry ingredients to the wet and stir until fully combined and wonderfully sticky.


5. Add the bacon and chocolate chips, stir.


6. Cover with plastic wrap and refrigerate for at least an hour.

7. Bake 12 minutes or until the center is set and the cookies are a deep golden brown.

8. Let the cookies cool on the pan for a few minutes before transferring them to a wire rack.

Thursday, February 17, 2011

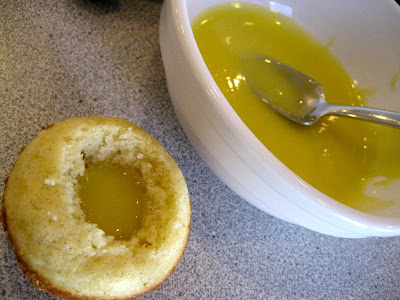
Passion Fruit Cupcakes with Coconut Frosting


            Baking is way outside my comfort zone.  When it comes to tarts, pies, and meringue I am a boss but the prospect of making cakes or cupcakes keeps me up at night.  It is not that I don’t enjoy eating cupcakes, I could eat cupcakes all day, but ask me to make them and I break out in a cold sweat.  So here I am, facing my fear, beater in one hand and stack of measuring cups in the other.  I have my copy of Williams-Sonoma’s “New Flavors For Desserts” on the table before me, (I thought it best not to become too improvisational on my first cupcake adventure) and a large cup of tea to calm the nerves.  Resisting the temptation to discard all measuring implements I diligently followed the recipe to a T and found that yes, if you mix A with B in such a way it does produce a cupcake – who knew?  A very rich, very dense, insanely buttery cupcake.  A bit too rich for my taste (and I go through at least a stick of butter an evening) so in the end I fell back on some Trader Joe’s boxed vanilla cake mix… I will not admit failure.  Perhaps the cupcakes were supposed to turn out like that?  Either way, I now have enough cupcakes to put on a campus wide event.  Come and get ‘um ladies!  But, seriously, these cupcakes were absolutely delicious! You could even play with the flavor combinations: lemon curd with lavender frosting, coconut curd with a blackberry frosting – the possibilities are endless.   

Ingredients

Batter
1 ¾ cups All-Purpose Flour
2 t Baking Powder
½ t Salt
1 c Heavy Cream, at room temperature
1 t Pure Vanilla Extract
1 ¼ c Unsalted Butter, at room temperature
2/3 c Granulated Sugar
2 Large Eggs, at room temperature

or 1 box white cake mix

Coconut Glaze
3 ¼ c Confectioners’ Sugar
1/3 c Unsweetened Coconut Milk
1 t Coconut Extract

Passion Fruit Curd
4 fresh ripe passion fruits or ¼ c thawed frozen passion fruit pulp
(I could only find a tin of tropical fruits in passion fruit juice and ¼ cup of the juice worked swimmingly) 
2 Large Egg Yolks, at room temperature
1/3 c Sugar
pinch of salt
3 T Unsalted Butter

Garnish
Chopped Macadamia Nuts

Method

Passion Fruit Curd
1. Scoop the passion fruit pulp into a fine-mesh sieve and set over a bowl.  Press on the pulp to push I through the sieve and discard the seeds.  Measure out ¼ cup of the juice and add it to a nonreactive saucepan with the egg yolks, sugar, and salt.  Cook the mixture over medium low heat, whisking continuously, until it thickens and turns a bright orange-yellow (2-3 minutes).  Remove from the heat and whisk in the butter.


2. Strain the mixture into a bowl and let cool at room temperature for 15 minutes.


3. Put plastic wrap over the curd and refrigerate for 1 1/2 hours.  

Cupcakes
1. Preheat the oven to 375.

2. Place a cupcake liner in each muffin tin.

3. In a bowl whisk together the flour, baking powder, and salt.  Combine the cream and vanilla in a liquid measure.

4. Using a stand mixer on low speed beat ¾ cup of the butter and the granulated sugar until blended, then raise the speed to medium-high and beat until light and fluffy (1-2 minutes).  
5. Beat in the eggs one at a time – make sure to scrape down the sides of the bowl.

6. Reduce the mixer speed to low and add the dry ingredients in three batches, alternately with the wet ingredients in two.  Raise the mixer speed to medium-high and beat for 1 minute.  This aerates the batter.  

7. Divide the batter evenly among the muffin cups and bake until the centers spring back when provoked (about 20 minutes). 

8. Let the cupcakes cool in the pan for 10 minutes before removing.  Let cool completely on a wire rack.

Frosting
1. Using a standard mixer on medium-low speed, beat the remaining ½ cup butter with half of the confectioners’ sugar until crumbly.  Add the remaining confectioners’ sugar and beat until powdery (about 1 minute)

2. In a liquid measure whisk the coconut milk and extract to incorporate.

3. With the standard mixer on medium speed, slowly add the coconut mixture and beat until blended.  Raise the speed up to medium-high and beat until light and fluffy (about 1 minute). 
Assembling
1. Using a paring knife cut a 1 ½-inch-wide cone-shaped core halfway into the center of each cupcake; gently remove the cores and set aside.


2. Fill each cupcake with about 1 T of the passion fruit curd and replace the cores.


3. Frost the cupcake with the icing, just use the back of your spoon, the glaze is so soft it won’t hold it’s shape very long even if you do go through the trouble of making them look fancy.

4. Sprinkle with the chopped nuts, let set for 15 minutes, and gorge yourself.  

Makes 12 Cupcakes


Monday, February 14, 2011

Lavender - Earl Grey Crème Brûlée


I love lavender.  I do not think a lot of people have tried lavender, or attempted to cook with it a whole lot – it is not an easy herb to find.  It has this penetrating and slightly sweet heady floral aroma with just barely a hint of lemon and mint.  For all its light floral notes it also has a slightly bitter aftertaste, which compliments sugary rich desserts beautifully.  No matter how you decide to use it, keep in mind lavender is extremely potent; a little goes a long way.

Uses for lavender:

- Add some dried lavender to a jar of sugar for a few weeks, it will impart some of its flavor into the sugar and then you can use it for baking, sweetening tea, or even in preserves.

If you want to use the buds, and not the infused sugar, try adding a few pinches to preserves or fruit compotes – it adds a sort of je ne se qua.

Infuse the flowers in cream (see Lavender – Earl Grey Crème Brûlée recipe below) and use it in ice creams or mousse.

Infuse the flowers in chocolate or syrups for a tasty snack or simple syrup to add complexity to your cocktails

Add a pinch to a savory dish (goes well with marjoram, oregano, parsley, rosemary, savory, and thyme).

- Fold it into a grain dish such as couscous or rice.

- Brighten a marinade or add depth to a rub and pair it with lamb, rabbit or pheasant (tea also does exciting things with pheasant or chicken).

- Put it in Crème Brûlée.

Divide the mixture evenly between ramekins. 
Ingredients


2 ½ cups heavy cream
½ cup (plus 2 tablespoons) sugar
A pinch of salt
1 ½ teaspoons dried lavender
½ teaspoon loose Earl Grey (I like Harney and Sons or Taylors of Harrogate)
8 large egg yolks

Method

1. Preheat the oven to 325˚

2. Bring the cream, salt and ½ cup sugar to a boil, stirring to keep the bottom from scalding.

3. Remove cream from heat, add lavender and tea, cover and let stand for 15 minutes.

4. In a large bowl whisk the egg yolks, just to combine.  A little at a time begin to add the cream, all the while whisking so that the eggs do not cook. 

5. Poor the liquid mixture through a strainer to remove the tea and lavender.

6. Place six ¾ cup ramekins in a baking dish and divide the egg and cream mixture evenly between them.  Transfer to the oven and poor enough hot water in the baking dish to come half way up the side of the ramekins.

7. Bake for 35 minutes, or until the custard gives a jolly little jiggle when you tap it. 

8. Remove from the oven and let cool in the water bath for about 30 minutes.  Wrap in plastic wrap and move to the fridge for at the least 4 hours.

9. When ready to serve, remove from the fridge, blot dry, and sprinkle evently the two tablespoons of sugar on each of the custards, tapping them so the tops are evenly coated. 

10. Using a culinary torch, brown the sugar, by moving in a figure eight – the room should smell nutty and glorious as the sugar begins to caramelize (See note). 

Makes 6 Crème Brûlée

NOTE: You can brown the tops with a broiler if in a pinch, but this is seriously a last resort – you risk heating the rest of the Crème Brûlée!


Saturday, February 5, 2011

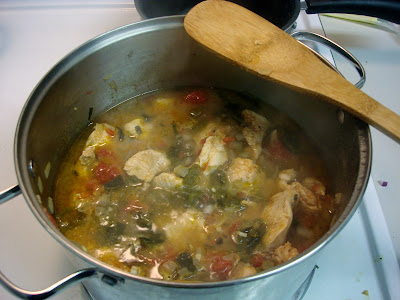
Creamy Chicken Enchiladas


This week I deemed Friday night “Mexican Night”.  Why?  There really was no real reason; outside I could not live another day without having these enchiladas.  I have a special fondness for this recipe; it was one of the first dishes I ever learned how to make.  I learned how to make it from my ex boyfriend’s mother, an excellent cook and a Dane (I know that sounds weird – learning to cook Mexican food from a Dane).  Over the years I have made some small changes but the overall flavor remains true to the original, simple but rich.  Each new ingredient you add brings dimension to the aromas emanating from the kitchen, filling the house, and the rest of the neighborhood, with onion, cumin, and finally cheese as it comes to a golden brown in the oven.  I did not manage to get many pictures of the final product, as the group I was cooking for were all crowded around the oven door by the time the enchiladas were ready, they really are that good.  Give them a go; you will make friends for life.    

Ingredients 

3 ½ lbs boneless chicken breast, cut into large cubes
3 fresh poblano chilies (skinned and seeded, see note)
1 jalapeno (skinned and seeded, see note)
1 large tomato, peeled, seeded, and chopped (or, if not in season, one standard can  
     chopped tomato)        
1 T butter
1 white onion, finely chopped
2 garlic cloves, minced
½ t cumin
½ c chicken stock
2 packages large flour tortillas
1 ½ c heavy whipping cream
2 cups shredded cheese (Chihuahua or Monterey Jack, the pre shredded Mexican four
      cheese blend also works well)
Salt to taste


Method

1.  Heat the butter on medium high heat, when it is about to brown add the onion and garlic, saute until they begin to soften.


2. Next add the poblano and jalapeno peppers, saute until they begin to release their juices (about 3-4 minutes).  At this point the onion should be starting to take on a golden hue.  


3.  Next add the tomato, cumin, chicken and stock.  Bring to a boil, once the outside of the chicken has begun to cook (turns white) reduce to a simmer and cover for 1-2 hours.


4.  Take the chicken off the heat and shred with two forks.


5. Clean the counters really well and put the tortillas out.  Put the mixture in the center of the tortilla and roll tightly.  Do not tuck the ends in, we want the cream to be able to penetrate the enchilada as they bake.  This will be very messy, embrace it. 


6. Pack the enchilada tightly in a casserole tray.


7.  Once all of your enchilada are made, poor the rest of the juice and any leftover chicken over the top.


8.  And then the cream (I actually use closer to two cups of cream).


9.  And then coat with the cheese.


10.  Place the whole thing in the oven at 350 until golden (about 15-20 minutes).

11.  To serve: add any combination of salsa, Salsa Verde, Guacamole, sour cream, cilantro and Pico de Gallo.


Enjoy!

NOTE: To get the skins to come off the poblano and jalapeno peppers easily first place them on a cookie sheet and broil, turning occasionally until very blackened and bubbling.  


Then put the peppers into ziplock bags, the steam will essentially remove the skins from the rest of the flesh.  


Once cool enough to handle you can easily pull out the seeds and skin with your fingers, leaving just the "meat" of the pepper behind.


Salsa Verde


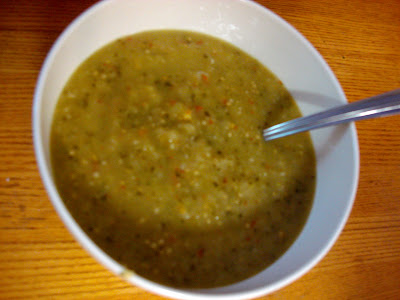
Chicken enchiladas and Salsa Verde (green sauce) is one of those classic flavor combinations.  I have never made Salsa Verde before, mostly because you seldom find tomatillos in New England, so you can image my excitement when at the grocery store in preparation for “Mexican night” I saw a pyramid of tomatillos perched above a mound of avocado.  With no real recipe in mind I walked the isles grabbing a bit or this, oh, and maybe a bit of that.  At the end of the day I ended up with this: a hearty, earthy, salsa with a zing.       


Ingredients

1/2 lb fresh tomatillos, husked and washed
4 dried chile de arbol
1/2 c cilantro, chopped
1 white onion, roughly chopped
2 garlic cloves, roughly chopped
2 T butter
12 oz chicken stock
Salt to taste

Method

1. First, shuck your tomatillos.  If your tomatillos are fresh, like mine were, they will be enclosed in a lovely husk of leaves.  To shuck, just peel them off.  It is really quite simple except they are quite sticky! Give them a rinse once you remove the husk.  


2. Once you have shucked the tomatillos put them in salted water with the chile de arbol to cover and bring to a boil.


3. Boil for about 10-15 minutes until they tomatillos are tender and the skin is pulling away from the flesh.  Drain and pick the stems off the chile de arbol.


4. Put the tomatillos, peppers, cilantro, onion and garlic in a food processor and blend until nearly smooth.  

5.  Heat the butter in a pan over medium high heat, add the purée and saute until it begins to brown and makes the room smell like heaven (about 4-5 minutes).  

6.  Add the stock, boil, and reduce to medium.  Simmer until the salsa just coats the back of a spoon.  


7.  Transfer to another container and plunge it into an ice bath to halt the cooking process.  Once cool you are free to eat it, bathe in it, or save it for later use.    

Guacamole


During the summer my ex boyfriend and his best friend used to do landscaping to make some extra cash monies.  The man they worked for was called Chuy and besides being an incredibly nice person, he was also an excellent cook.  He was of that class of people who live to share everything they have with those around them, and Chuy had a lot to share when it came to the kitchen.  This is his recipe for guacamole.  I feel like guacamole is one of those subjective dishes, often sparking highly emotional debate.  This is Chuy’s recipe, and I think he had it right, but feel free too add a bit more, or less, of any of the ingredients to suit your taste!       


Ingredients

4 ripe avocados, pitted and diced (reserve the pits: see note) 
1 tomato, seeded and chopped into medium dice
1/2 red onion, medium dice
1 jalapeno, minced
1 large clove garlic, minced
1/2 c chopped cilantro 
Juice from 2 limes
Salt to taste

Method

1. Put all the ingredients into a bowl and mix.


2. Be gentle so as to leave some of the cubes of avocado intact.


NOTE: As you can see in the above picture I like to leave the pits in with my guacamole, this is because it prevents the avocado from oxidizing.  Avocado contains an enzyme called polyphenol oxidase which makes it more susceptible than most fruits and vegetables to oxidization.  I wish I could tell you there was some miraculous chemical reaction that occurred between the guacamole and pit but the truth is the pit really just physically blocks air from oxidizing the avocado.   You can also put plastic wrap over the guacamole while you are waiting to serve it.  But, I like to use the pits, just discard them before bringing it to the table! 


Pico de Gallo


Pico de gallo is a fresh, uncooked condiment usually made from chopped tomato and onion.  It has a gloriously firm texture that I love served over just about anything, or, just with a spoon out of the bowl.  The lime juice makes it wonderfully bright allowing for its flavors to come forward, particularly with how I served my pico, over baked chicken enchiladas.  

Ingredients

5 plum tomatoes, seeded and cut into a medium dice
1 white onion, small dice 
1/2 jalapeno, cut into a fine brunoise 
1/4 c chopped cilantro 
Juice from 2 limes 
Salt to taste

Method

1. Mix all ingredients together in a bowl

Remove the seeds by quartering the tomato and slicing against the flesh from tip to base.
Place all ingredients in a bowl...

And Mix.


Sunday, January 30, 2011

Salty Oatmeal Cookies


Every summer my family vacations on Wellfleet, and all year I look forward to the oatmeal cookies you can pick up at the local market.  After picking up a box I would walk back along the beach that stretched from the pier all the way out to our one room Wellfleeter cottage.  As I walked I would take a cookie from the box and slowly eat it; the sea salt sprinkled on top perfectly complimenting the briny ocean air.  Well, these are not those cookies, but they are tasty!  They are wonderfully crisp on the outside and soft in the middle and in true Wellfleet fashion I sprinkle salt over the top before sticking them in the oven.  

Ingredients

9 oz unbleached all purpose flour
7g baking soda (see note for some chemistry talk)
4 g cinnamon
4 g salt
¾ lb butter (at room temperature)
¼ lb sugar
¾ lb light brown sugar
2 extra large eggs
½ T vanilla extract
¾ lb rolled oats (I like Bob’s Red Mill)
Fleur de Sel

Method

1. Preheat the oven to 375.

2. Line your baking sheets with parchment paper.

3. Sift together the flour, baking soda, cinnamon, and salt.

4. Cream the butter, sugar, and light brown sugar on medium speed until light in color.  Scrape down the bowl as needed. 


5.  Blend the eggs with the vanilla.


6. Add the eggs and vanilla to the creamed butter-sugar mixture in three stages until incorporated.  


7.  On low speed add in the flour, baking soda, cinnamon, salt, and oats in three stages, make sure to keep scraping down the sides and bottom of the bowl so that everything is worked in. 


8. Scoop the batter onto baking sheet, make sure the little guys have room to breathe, and sprinkle the tops with fleur de sel. 


9. Bake for 10 minutes, or until brown around the edges, rotating half way through. 

10. Let the cookies rest on the sheet for a few minutes before moving them to a cooling rack.  (If you don't have a cooling rack... I just discovered that if you take apart the shelves of your dorm fridge you can make one of your own!) 


So pretty.

I also did a few dozen with chopped walnuts and chocolate chips.  While tasty, I still prefer the original! 


Makes 3 dozen

NOTE: Today one of my friends asked me why I used baking soda in my cookies and so I thought I would take a moment to explain.  Bakers have very strong opinions on what they like to use in their recipes: baking powder or baking soda, maybe a bit of both.  The truth is they both will result in a different product.  While both are chemical leavening agents (meaning they make batter rise when brought to high temperatures by the release of carbon dioxide), they react differently depending on the other ingredients present in the recipe.  It should be noted that baking power actually contains baking soda but should not be used in place of baking soda.  

Baking Soda: Baking soda is pure sodium bicarbonate (basic).  When combined with an acidic agent (such as chocolate) and moisture there is an immediate chemical reaction.  Because the reaction is immediate you must get your goods in the oven tout de suite or you will have some paper thin cookies.


Baking Powder: Baking powder contains both an alkaline ingredient (sodium bicarbonate) and an acidifying agent (cream of tartar) and a drying agent (starch) (so both an acid and a base).  When exposed to liquid it produces carbon dioxide gas, which leavens doughs and batters.  Double-acting backing powder contains ingredients that produce two leavening reactions: once upon exposure to liquid, the second when heated.